Common Reasons Your Air Conditioner Is Not Cooling
When your air conditioner not cooling, it can be due to several reasons. Understanding these common issues can help you troubleshoot the problem quickly. Here are typical factors to consider:
- Thermostat Settings: Incorrect settings on the thermostat can prevent your AC from cooling. Ensure it’s set to ‘cool’ and the temperature is lower than room temperature.
- Dirty Air Filters: A clogged air filter restricts airflow, reducing your AC’s efficiency. Check and replace it if necessary.
- Blocked Condenser Unit: Debris around the condenser can obstruct airflow and impede function. Keep the area clear.
- Frozen Evaporator Coils: The coils can freeze due to low refrigerant or restricted airflow, stopping the cooling process.
- Low Refrigerant Levels: Refrigerant is essential for cooling. If levels are low, the AC can’t cool your space effectively.
- Faulty Parts: Components like the compressor, capacitors, or fans can fail, leading to cooling issues.
- Dirty Condenser Coils: Dirt and grime on the coils can hinder their ability to dissipate heat.
- Duct Leaks or Blockages: Leaks or obstructions in the ductwork can significantly reduce cooling efficiency.
Identifying the root cause is a critical first step. Once you know what to look for, you can proceed with the right fix. If you’re unsure, consult a professional to avoid causing further damage.
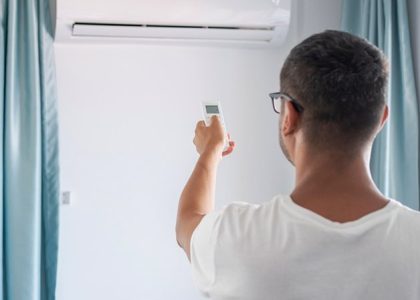
Step 1: Check the Thermostat Settings
The first step in diagnosing your air conditioner not cooling is to examine the thermostat settings. An incorrectly set thermostat is a common and often overlooked cause of an AC unit’s failure to cool a space. Follow this simple checklist to ensure your thermostat settings are correct:
- Turn on the thermostat: Ensure it is powered and the display is visible.
- Set to ‘cool’ mode: Verify that the thermostat is set to the ‘cool’ option. Other settings like ‘heat’ or ‘fan’ won’t cool your room.
- Adjust the temperature: The temperature set-point should be lower than the current room temperature. If it’s not, lower it to a comfortable level.
- Check battery and wiring: If the thermostat is unresponsive, replace the batteries or check for loose wiring.
- Programmable thermostat: If you have a programmable thermostat, ensure the cooling schedule is set correctly for the current time and day.
Remember, the thermostat is the command center for your AC system. Ensuring it is correctly configured is essential for smooth operation. If the issue persists after these checks, move on to the next step of the troubleshooting process.
Step 2: Inspect and Replace the Air Filter
After checking the thermostat, the next step is to inspect the air filter. A dirty filter can block airflow, causing your air conditioner not cooling efficiently. Follow these steps for inspection and replacement:
- Turn off the AC: Safety first. Ensure the unit is powered down before you begin.
- Locate the filter: Find the filter. It’s usually situated in the return air duct or near the blower unit.
- Check for dirt: Examine the filter. If you see dirt build-up, it’s time for a change.
- Remove the old filter: Gently take out the dirty filter. Some models have a simple slide-out design.
- Insert the new filter: Get the right size and follow the arrows on the filter for proper direction. Slide it into place.
- Secure the filter: Make sure it fits snugly without gaps. This prevents dust from bypassing the filter.
- Turn on the AC: Once the new filter is in place, power up the unit.
A clean air filter helps your AC run efficiently. It improves air quality and reduces strain on the system. It is a simple yet crucial step in fixing an air conditioner not cooling. Remember to check it regularly and replace it every 1-3 months, depending on usage and environment.
Step 3: Clear Debris from Around the Outdoor Unit
If after inspecting the thermostat and air filter your air conditioner not cooling problem persists, the next area to check is the outdoor unit. It’s crucial to maintain a clear space around the condenser unit for it to work efficiently. Here are simple steps to ensure the area is obstruction-free:
- Turn off the unit: Always ensure the AC is turned off before you start.
- Remove debris: Clear leaves, twigs, and dirt that are blocking the unit.
- Trim plants: Cut back shrubs or plants that are too close to the unit. Keep a clearance of at least 2 feet around.
- Check for blockages: Look for anything obstructing the condenser’s airflow.
- Clean the unit: Wipe the unit with a cloth to remove surface dirt.
Debris around the outdoor unit can restrict air intake and exhaust, leading to your air conditioner not cooling properly. Regularly removing obstructions will help the unit to efficiently disperse heat from your home. If there are any protective grilles or panels, ensure they are secured back in place after cleaning.
Step 4: Examine the Condenser Coils and Fins
Once your air conditioner is off and the area is clear, it’s time to check the condenser coils and fins. These components are crucial for dissipating heat. If they’re clogged with dirt or bent, they can’t work properly. Here’s what you need to do:
- Power down the AC: Make sure to disconnect power to avoid any electrical accidents.
- Visually check the coils: Look for dirt, debris, or grime buildup on the condenser coils.
- Clean the coils: If they’re dirty, gently rinse them with a garden hose. Do not use a high-pressure washer as it can damage the fins.
- Straighten the fins: Carefully straighten any bent fins with a fin comb. Bent fins can block airflow.
- Inspect for damage: Look for signs of corrosion or other damage. These might need professional attention.
Keeping the condenser coils and fins in good condition is key for your air conditioner not cooling your home. Make sure you handle these parts gently to avoid any damage. If cleaning does not improve cooling, it could be time to call in a technician.
Step 5: Assess the Refrigerant Levels

If your air conditioner is still not cooling after completing the previous steps, it may be time to check the refrigerant levels. The refrigerant is the substance that your AC system uses to remove heat and humidity from the air inside your home. Here’s how you can assess whether the refrigerant levels are adequate:
- Turn off the AC system: Before any inspection begins, ensure the unit is powered down.
- Locate the refrigerant lines: Find the refrigerant lines usually near the outdoor unit of your AC system.
- Inspect for leaks: Look for signs of refrigerant leaks, which may include visible damage or hissing sounds from the lines.
- Check the pressure: Use a refrigerant gauge to check the pressure in the refrigerant lines. Compare it with the specifications for your system.
- Seek professional help: Assessing refrigerant levels might require expertise. If you’re not trained, consider calling a certified technician.
Low refrigerant levels can prevent your air conditioner from cooling effectively and may indicate a leak. Due to environmental concerns and the technical nature of handling refrigerants, it’s often best to have a professional check and refill the refrigerant. They can also repair any leaks to ensure your system runs efficiently and safely.
Step 6: Inspect the Air Ducts for Obstructions
If your air conditioner not cooling effectively, blocked or leaky air ducts may be the culprit. Air ducts play a vital role in distributing cool air throughout your home. If there’s an obstruction or damage, your AC efficiency suffers. Follow these steps to check for ductwork issues:
- Turn off the HVAC system: For your safety, ensure the system is off before you start.
- Visually inspect ducts: Look for any visible signs of blockage or damage in accessible ducts.
- Check for leaks: Feel for air escaping from seams or connections. Seal any leaks with duct tape or mastic.
- Ensure registers are open: Verify that all supply vents and return grilles are open and unblocked.
- Clean the vents: Dust and debris in the vents can impede airflow. Remove and clean them.
- Call a professional: If you suspect serious blockages or damage you can’t reach, it’s best to contact a technician.
Regular checks and maintenance of your air ducts can prevent airflow issues and keep your system running efficiently. It’s a simple step that can make a big difference in your air conditioner’s cooling performance.
Step 7: Professional Maintenance and Repair
If you’ve gone through the previous steps and your air conditioner not cooling issue persists, it may be time to seek professional help. Skilled technicians have the experience and tools to diagnose complex problems and perform safe repairs. Here’s why professional intervention is the next best step:
- Technical Expertise: Professionals have the training to diagnose intricate issues quickly and accurately.
- Proper Tools: Technicians use specialized tools that are crucial for certain repairs and diagnostics.
- Safety: Handling electrical components and refrigerants can be dangerous. Experts know how to do this safely.
- Warranty Preservation: DIY repairs can void your AC’s warranty. Professionals ensure compliance with warranty stipulations.
- Comprehensive Maintenance: A pro can provide a thorough maintenance check to spot future problems early.
- Time-Saving: A technician can solve the problem faster than you might, getting your cooling back quickly.
- Cost-Effective: While there’s an upfront cost, professional repairs can save money by preventing further damage.
When choosing a service provider, look for licensed and insured technicians with good reviews. Regular professional maintenance can prevent many common issues with air conditioners not cooling effectively, ensuring a long-lasting, efficient system. If you’re unsure about any part of the troubleshooting process, it’s always safer and more reliable to turn to a certified professional.
Preventative Measures to Avoid Future Cooling Issues
Preventative maintenance is key to avoiding the dreaded ‘air conditioner not cooling’ scenario. To ensure your AC unit operates efficiently and effectively, consider these proactive tips:
- Schedule Regular Maintenance: Just like a car, your AC needs regular check-ups. Have a professional inspect your system annually.
- Change Air Filters Regularly: Don’t wait until filters are clogged. Replace them every 1-3 months to keep air flowing smoothly.
- Keep the Condenser Area Clear: Regularly clear debris and maintain space around the outdoor unit. Do this at least twice a year.
- Inspect Seals and Ductwork: Twice a year, check seals around windows and doors. Look for any ductwork leaks and seal them right away.
- Monitor Thermostat Settings: Frequently check the thermostat for accuracy. Consider upgrading to a smart thermostat for optimal performance.
- Be Mindful of Refrigerant: Never handle refrigerant yourself. If you suspect a leak, call a technician immediately.
By following these preventative measures, you can decrease the chance of your air conditioner not cooling when you need it most. Regular attention can catch small problems before they lead to big ones, saving you time and money in the long run. Always consult with a professional for complex maintenance tasks to ensure your AC system remains in top shape.