Introduction to DIY Air Conditioning
With rising temperatures and soaring energy bills, a DIY air conditioner could be a lifesaver. This project suits those who enjoy a challenge and want to cool down cost-effectively. Making your own AC unit means customizing it to fit your needs. It’s a project that combines resourcefulness with practical skills. But approaching this project requires a thorough understanding and careful planning. This section will introduce you to the basics of DIY air conditioning, setting the stage for a rewarding experience.
Building a DIY air conditioner can help you understand how cooling systems work. It also allows you to appreciate the engineering behind commercial AC units. Moreover, it can be a fun weekend project or a learning experience for those interested in mechanics or sustainability. This guide will provide step-by-step instructions, safety tips, and maintenance advice. We’ll also talk about the tools, materials, and methods needed to make your homemade air conditioner efficient and effective. Whether you’re a novice or a seasoned DIY enthusiast, you’ll find this guide a valuable resource for beating the heat.
Tools and Materials Needed for Your DIY AC
To start your DIY air conditioner project, you will need a collection of tools and materials. Most can be found at local hardware stores or may already be in your home. Let’s break down what you’ll need.
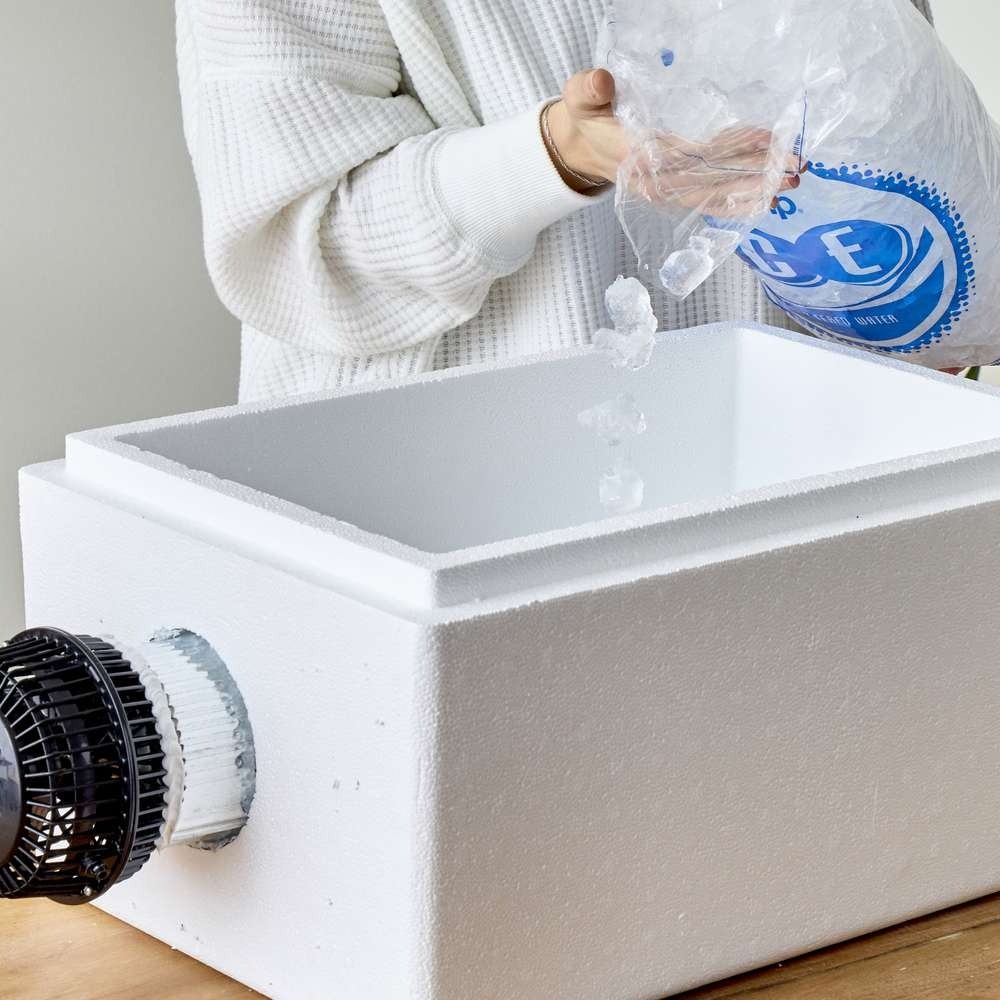
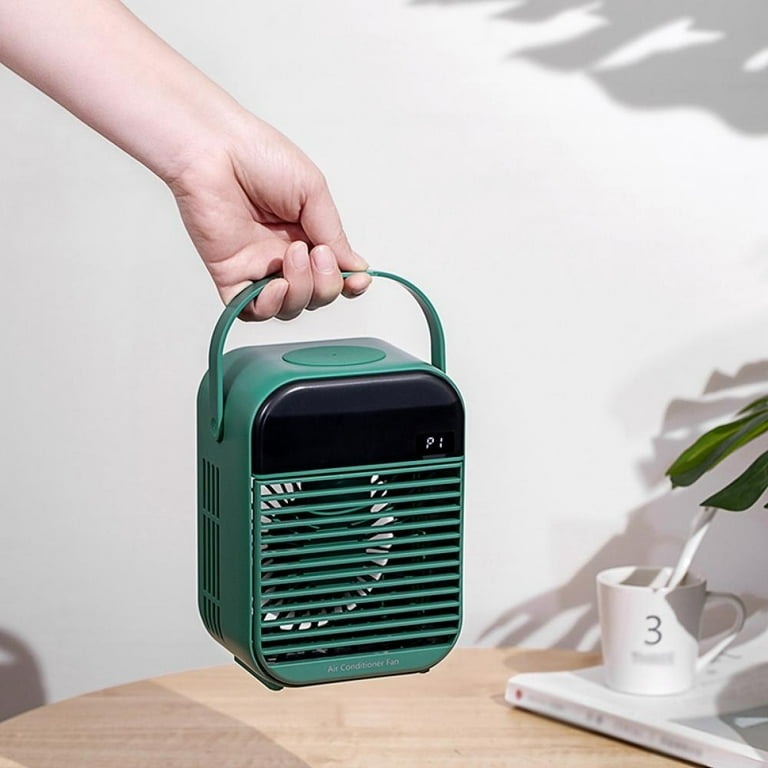
First, a key component is a fan. It will push air through the system. You can use a box fan, a desk fan, or even a computer fan. Next, find a cooling mechanism. Ice or freezer packs can serve this purpose. A larger fan will need more ice to cool effectively.
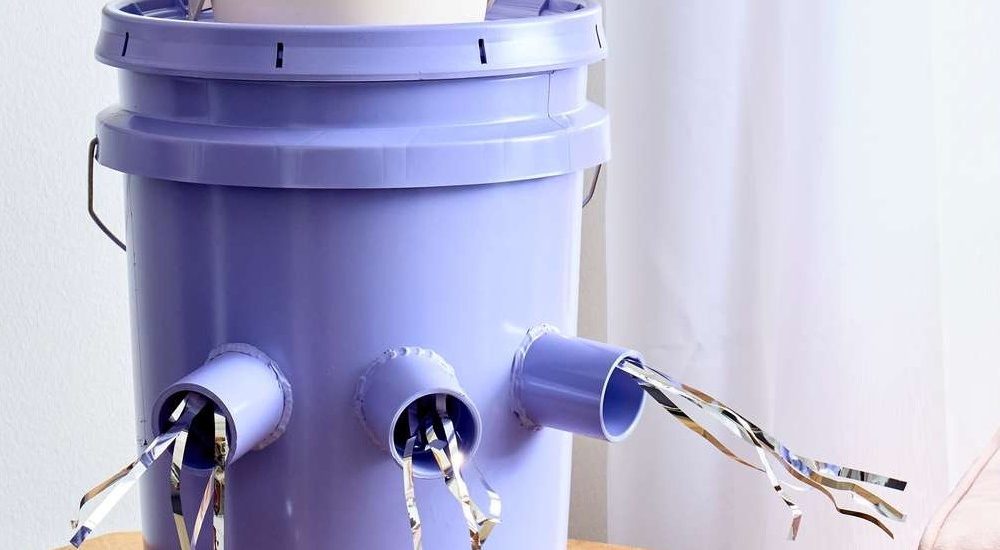
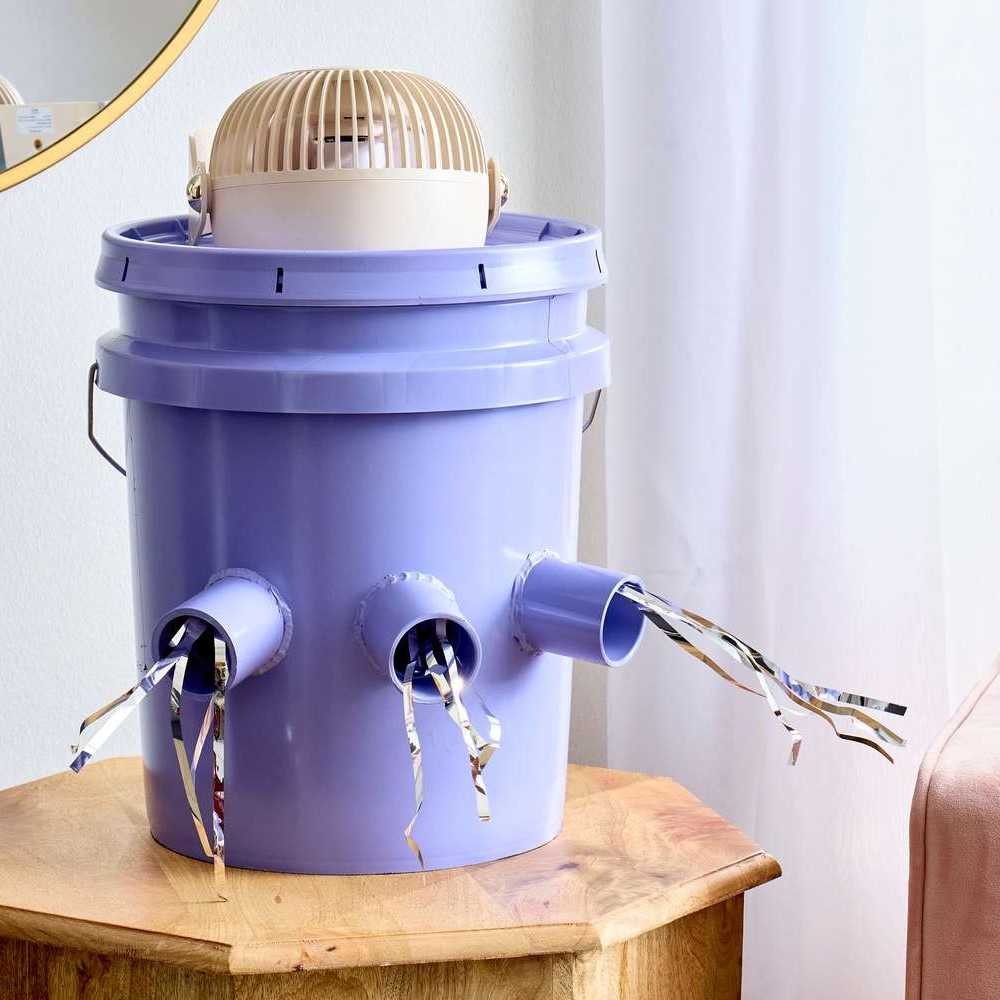
You will also need something to hold the ice. A styrofoam cooler is ideal. It’s lightweight and insulates well. If you don’t have one, any container will do. Just make sure it can fit your fan and the ice comfortably.
For the structure, you may need some PVC pipes or flexible tubing. This helps direct the cool air. Also, gather tools like a knife or saw, and a marking pen. These help with making modifications to the cooler or cutting the tubing.
To bring everything together, you’ll need adhesive tape or hot glue. It’s crucial for securing the fan to the cooler or sealing connections.
Lastly, consider a condensation collector. As the ice melts, it will create water. Having a place to collect this will keep things tidy.
Ensure you have all these tools and materials ready. With them, you are set to start building your DIY air conditioner.
Safety Precautions Before Starting Your DIY Project
Before diving into building your diy air conditioner, safety must come first. Here are some safety measures to consider.
- Read All Instructions: Before starting, make sure to read through the guide completely. Understand each step.
- Wear Protective Gear: Use gloves to protect your hands and goggles to shield your eyes. These will guard against sharp objects and debris.
- Check Your Tools: Ensure all tools are in good working order. Frayed wires or damaged equipment can be hazardous.
- Work in a Ventilated Area: As you’ll be working with materials that may produce fumes, choose a well-ventilated space.
- Handle Ice with Care: When dealing with ice or freezer packs, use care to prevent slips or spills.
- Secure All Connections: After assembly, double-check that all parts are securely attached. Tight connections prevent accidents.
- Electric Safety: If you’re using an electric fan, keep water away from electrical components. Avoid electric shocks.
- Be Mindful of Sharp Edges: Cutting PVC or styrofoam can leave sharp edges. Smooth these out to prevent cuts.
- Supervise Children: If kids are assisting or are nearby, watch them closely. DIY projects can be educational but also risky.
- Plan for Emergencies: Keep a first aid kit and a phone within reach. In case of injury, you’ll be prepared.
By following these safety tips, you’ll create a safer environment for your DIY air conditioner project. It’s better to be cautious and take your time than to risk an injury.
Step-by-Step Instructions for Building a DIY Air Conditioner
Now that you have gathered your tools, materials, and observed safety measures, let’s start building your DIY air conditioner. Here’s a step-by-step guide to help you through the process:
- Preparation: Assemble all tools and materials. Make sure you have a clear workspace.
- Fan Setup: Attach the fan to one side of the styrofoam cooler using adhesive tape or hot glue. Ensure it’s secure.
- Modify Cooler: Cut a hole in the cooler lid. Size it to fit the PVC pipes or tubing.
- Install Pipes: Insert PVC pipes or tubing into the hole. Seal around the edges with adhesive to prevent air leaks.
- Load Ice: Fill the cooler with ice or freezer packs. Do not overfill, as you’ll need space for air to circulate.
- Check Airflow: Place the lid on the cooler. Turn on the fan to test airflow through the pipes. Make adjustments if needed.
- Condensation Management: Set up a condensation collector under the holes to catch water as the ice melts.
- Final Inspection: Once everything is in place, give your DIY air conditioner a careful look. Double-check all connections.
- Test Run: Power up your AC. Feel the air to ensure it’s cool.
- Enjoy: Position your new AC in a desired spot. Relax and enjoy the cool air.
Follow these steps carefully, and you will have your own homemade air conditioning unit. As you work, remember to keep efficiency in mind. Minimize waste and maximize cooling by securing all seals and checking for leaks. Your DIY air conditioner is a great way to beat the heat while taking pride in your handiwork.
Tips for Enhancing the Efficiency of Your Homemade AC
After building your diy air conditioner, the next step is to boost its efficiency. This means getting the most cooling effect using the least amount of ice and energy. Here are practical tips to achieve this.
- Seal Gaps: Check for any air leaks in the cooler and seal them. Use adhesive tape for an airtight seal. This keeps cold air from escaping.
- Insulate: Wrap the outside of the cooler with insulating material like foil or fabric. It keeps the inside cold for longer.
- Position Fan Appropriately: Place the fan so it blows air into the cooler efficiently. The right placement means better air circulation.
- Use Saltwater Ice: Add salt to water before freezing. Salt lowers the freezing point, making ice last longer.
- Freeze Bottles: Use frozen water bottles instead of ice cubes. They melt slower and are easy to replace.
- Airflow Path: Create a clear path for cool air to flow. Remove any obstructions in and around the AC.
- Regular Ice Replacement: Change out the ice or freezer packs before they fully melt. It maintains maximum cooling.
- Use Reflective Materials: Line the inside of the cooler with aluminum foil. It reflects cold air out through the pipes.
By following these tips, your homemade air conditioner will be more effective. It will deliver a better cooling experience while saving on resources. Remember to watch out for frost build-up and manage condensation to keep your DIY AC running smoothly.
Maintenance and Troubleshooting for Your DIY Air Conditioner
Maintaining your DIY air conditioner is key for long-lasting performance. Here are straightforward tips for upkeep and troubleshooting.
Regular Cleaning: Dust and dirt can block airflow. Clean your fan blades and cooler regularly.
Inspect for leaks: Check the cooler and tubing for air leaks. Patch any holes with adhesive tape.
Monitor Ice Levels: Keep an eye on the ice. Replenish it to keep the cool air flowing.
Check Electrics: If you’re using an electric fan, ensure the connections are dry and secure.
Manage Condensation: Empty the condensation collector often. This will prevent water overflow.
Troubleshooting is also a breeze with these tips:
Weak Airflow: If air isn’t flowing well, inspect the fan and make sure it’s not obstructed.
Not Cooling: No cool air? Check if ice needs replacing or if there are leaks in the system.
Water Leaks: Spot a puddle? Make sure the condensation collector is in place and not full.
Fan Issues: Fan won’t run? Check the power source or for any loose connections.
By keeping up with these tasks, your homemade AC unit should stay in tip-top shape. Addressing problems as soon as they arise is the best way to ensure your DIY air conditioner keeps beating the heat.
The Pros and Cons of a DIY Air Conditioning System
Efficiency, cost savings, and personal satisfaction are some upsides of building a DIY air conditioner. But, there are also potential downsides to consider. Let’s delve into the pros and cons.
Pros of a DIY Air Conditioning System
- Cost-Effective: Making your own AC can save money compared to buying a commercial unit.
- Customizable: Tailor your system to meet specific cooling needs and space requirements.
- Educational Value: Learn about the mechanics and engineering of air conditioning systems.
- Sustainability: Use materials you already have to reduce waste.
- Enjoyment: Take pride in creating a functional product on your own.
Cons of a DIY Air Conditioning System
- Time Consuming: Building an AC unit takes time, which might not be ideal for everyone.
- Performance Limits: DIY systems may not cool as effectively as professional units.
- Maintenance Needs: Homemade ACs can require more frequent upkeep.
- Technical Challenges: Some might find the building process complex without proper skills.
- Safety Risk: Without appropriate measures, there is a risk of injury or damage.
Weighing these considerations is key before starting a DIY AC project. Be honest about your skills, budget, and needs. If the pros outweigh the cons for you, a homemade AC can be a rewarding project.
Conclusion: Embracing the DIY Spirit for Cooling Solutions
Building a diy air conditioner presents both challenges and rewards. It’s a hands-on approach to staying cool. For those who enjoy making things themselves, it can be a fun and fulfilling endeavor. The satisfaction of creating your own cooling system is unmatched. You get to apply practical skills, learn on the go, and enjoy the fruits of your labor.
This guide aimed to empower you with knowledge and confidence to undertake this project. By collecting the right tools and materials, following safety precautions, and using the step-by-step instructions provided, you’ve become capable of building an effective DIY air conditioner. Through maintenance and troubleshooting, you ensure its longevity and efficiency. Not to mention, you’ve likely saved money and tailored this cooling solution to your personal needs.
While homemade AC units might not match commercial ones in power, they offer unique benefits. They spark creativity, provide learning opportunities, and can be more sustainable. It’s about more than just beating the heat; it’s about embracing a lifestyle of innovation and self-reliance.
In a world where we often rely on readymade solutions, taking the time to build something from scratch is a worthy pursuit. Whether you are a beginner or a seasoned DIYer, the process itself can be as rewarding as the end product. So, as you kick back and enjoy the cool breeze from your newly minted air conditioner, take a moment to appreciate the journey you’ve embarked on and the DIY spirit it celebrates.